Refinishing wood floors is a fantastic way to restore their natural beauty and bring new life to your home. Whether your wood floor is worn, scratched, or just in need of a refresh, refinishing can make a significant difference. In this guide, we will explore the essential steps and expert tips to help you achieve professional results with wood floor refinishing.
Key Takeaways
- Preparing the floor and room properly is crucial before refinishing wood floors.
- Removing base moulding is necessary to access the entire floor for sanding.
- Rough-sanding with coarse sandpaper and progressing to finer grades helps achieve a smooth finish.
- Sanding edges and corners ensures the entire floor is uniformly treated.
- Screening the floor can level unevenness and buff away sanding scratches.
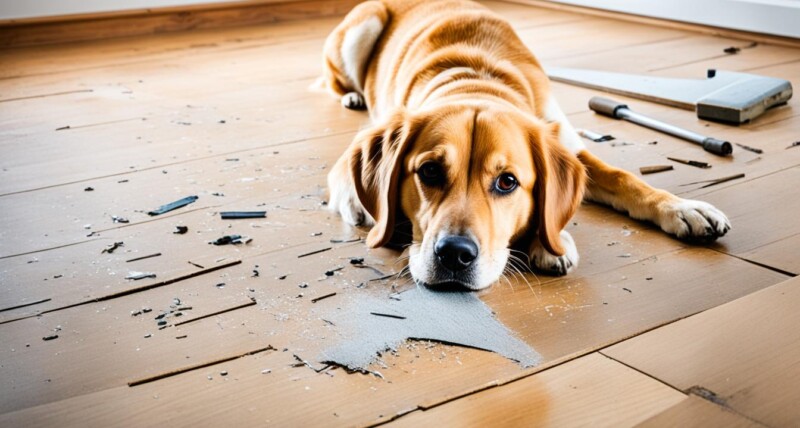
Before diving into the process of refinishing wood floors, it’s important to prepare the floor and room properly. This initial step sets the foundation for a successful refinishing project. Start by performing a water droplet test to determine if the floor needs refinishing. Simply sprinkle a few drops of water on the floor – if it soaks in, it’s time to refinish. Next, move furniture and remove carpets and rugs to clear the space.
Additionally, it’s crucial to hammer down protruding nails, check for squeaks, and secure any loose floorboards. This will ensure a firm and even surface for sanding. Removing debris from the floor with a vacuum cleaner or mop is essential to eliminate any loose dirt before sanding. Sealing air vent covers and doors will prevent dust from spreading throughout your home.
By following these initial steps, you’ll create a clean and well-prepared surface for the refinishing process. Stay tuned as we continue to guide you through the journey of refinishing your wood floors, step by step.
How to Remove Base Moulding for Floor Refinishing
Before embarking on the process of sanding and refinishing your wood floors, it is important to remove the shoe base moulding along the walls. This step ensures that the entire surface of the floor can be properly sanded and refinished, leaving no unfinished edges.
To remove the base moulding, follow these steps:
- First, gather the necessary tools, including a pry bar and a piece of scrap wood to protect the baseboard from damage while prying.
- Carefully insert the pry bar between the base moulding and the wall, maintaining a gentle yet firm pressure. Use the scrap wood as a buffer between the pry bar and the baseboard to prevent any scratches or dents.
- Gradually pry the moulding away from the wall, working your way along its length. Take care not to pry too forcefully, as this could cause damage to the moulding or the wall.
- Once the moulding is removed, it is important to label or number each piece for easy reinstallation after the floor has been refinished. This will help ensure a seamless and professional-looking result.
If your room does not have shoe base moulding, it is essential to take precautions to avoid damaging the wall when operating the sander. Using painter’s tape or other protective measures can help prevent unintentional scratches or marks on the wall.
“Removing the base moulding is a crucial step in preparing the floor for refinishing. It allows for a thorough and even sanding process, ensuring a beautiful finished result.”

By removing the shoe base moulding before refinishing your wood floors, you can achieve a more professional and polished look. This step is essential for creating a seamless transition between the floor and the wall, ensuring a beautifully restored space.
Steps to Rough-Sanding the Floor
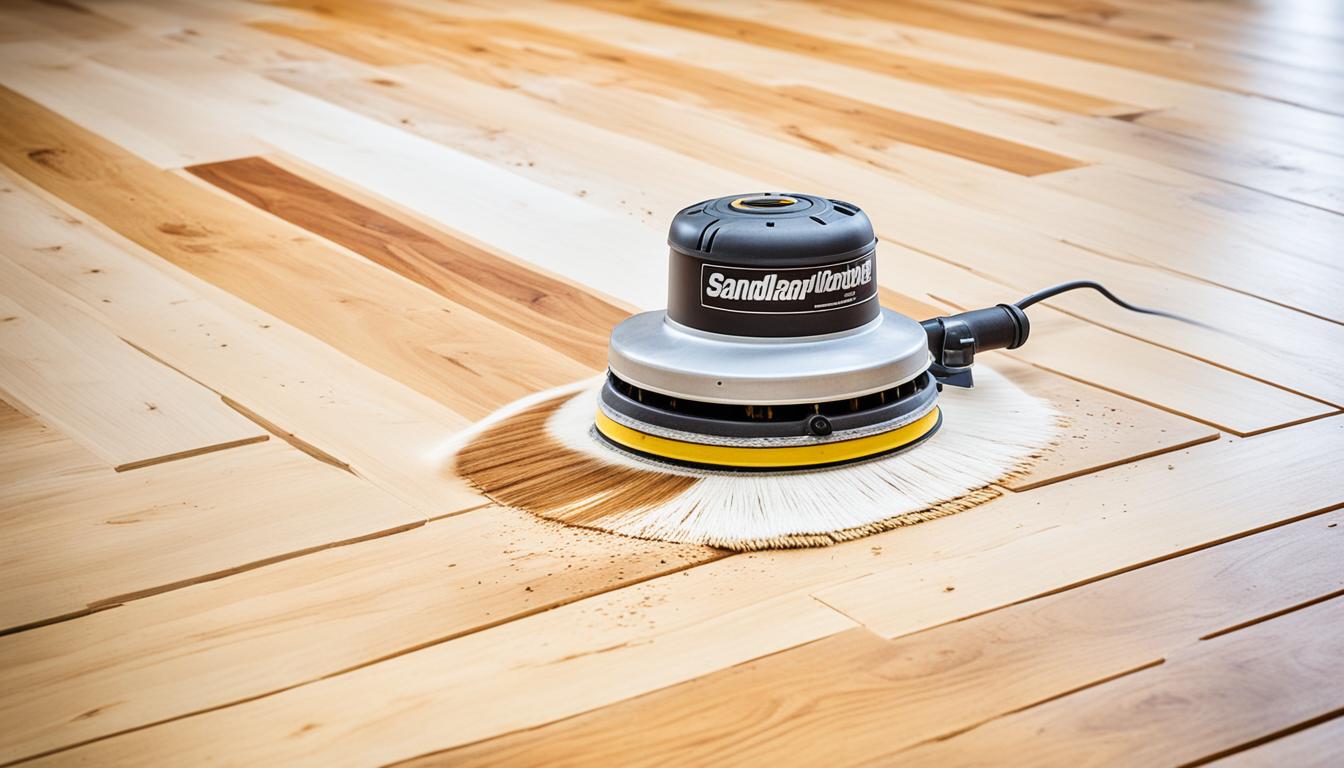
Rough-sanding the floor is an important step in hardwood floor refinishing. It involves using a drum sander or belt sander with coarse sandpaper to eliminate scratches and stains. By following these steps, you can achieve a professional floor refinishing finish.
Step 1: Choose the Right Sander and Sandpaper
Before starting the rough-sanding process, make sure you have the appropriate sander and sandpaper. A drum sander or belt sander is recommended for this stage. Additionally, select coarse sandpaper to efficiently remove scratches and stains from the surface.
Step 2: Prepare the Floor
Prior to using the sander, prepare the floor by removing furniture, carpets, and rugs. Clear the area to create a clean working space. Additionally, hammer down any protruding nails, fix squeaks, and secure loose floorboards for a stable surface.
Step 3: Sanding Technique
When using the sander, work back and forth over 3-4 foot lengths. Use overlapping strokes to ensure even sanding across the entire floor. This technique helps to remove scratches and create a smooth surface for refinishing.
Step 4: Progress with Multiple Sandpaper Grades
Begin with coarse sandpaper to eliminate deep scratches and stains. Gradually progress to medium and fine grades for a smoother finish. Changing the sandpaper grade allows for more refined sanding and prepares the floor for the next refinishing steps.
Remember to replace the abrasive belt or sandpaper after sanding approximately 250 square feet. This ensures the effectiveness of the sanding process and avoids using worn-out sandpaper.
Once you have completed the rough-sanding stage, your floor is now ready for the next steps in the refinishing process. Continue following the guide to achieve exceptional results.

Sanding Edges and Corners
After rough-sanding the floor, it is important to use a floor edger or small orbital sander to sand corners, edges, and small areas that the drum sander couldn’t reach.
“Sanding the edges and corners requires attention to detail to achieve a consistent finish.”
Starting with coarse-grit sandpaper and gradually moving to finer grades will ensure a smooth and uniform result.
If there are areas that the edger cannot reach, a scraper and sandpaper can be used to remove the old finish by hand.
Sanding the edges and corners of the floor is a crucial step in the refinishing process. It allows for a seamless transition between the sanded and unsanded areas, creating a professional and polished look.
Screening the Floor
Screening the floor is an additional step in the wood floor refinishing process that can help achieve a smooth and flawless surface. It is particularly useful for leveling minor unevenness left by the drum sander and edger, as well as buffing away any remaining sanding scratches.
To perform screening, you will need a floor buffer equipped with fine-grit screening pads. These pads are designed to gently abrade the surface of the wood, smoothing out imperfections and creating an even texture.
To achieve the best results, start by making broad arcs across the floor with the floor buffer. Be sure to work in a consistent and systematic manner, covering the entire surface of the floor. This technique helps ensure a uniform and flawless finish.

This additional step of screening the floor can make your DIY project look more professional and significantly improve the overall appearance of the wood floor. By addressing minor imperfections and scratches, screening helps create a beautiful canvas for the final steps of sanding and sealing.
Removing All Dust
After sanding the wood floor with different grades of grit, it is crucial to thoroughly remove all dust and debris to achieve a quality floor refinishing. Dust and hairs can leave imperfections in the floor finish when staining. Follow these steps to ensure a dust-free surface:
- Sweeping and Vacuuming: Start by sweeping the floor with a broom to remove loose debris. Next, use a vacuum cleaner with a brush attachment to thoroughly clean the entire floor surface, including the corners and edges.
- Tack Cloth: To capture any remaining dust, use a tack cloth. This sticky cloth is designed to pick up fine particles and is especially effective in preparing the floor for staining. Gently wipe the tack cloth across the entire surface of the floor, applying slight pressure to ensure all dust is removed.
By sweeping, vacuuming, and using a tack cloth, you can achieve a dust-free surface for the next steps of your quality floor refinishing project.
“Achieving a dust-free surface is essential for a flawless floor refinishing job. Taking the time to thoroughly clean the floor will ensure a smooth and professional finish.”

| Step | Action |
|---|---|
| 1 | Sweep the floor with a broom to remove loose debris. |
| 2 | Vacuum the floor with a brush attachment to thoroughly clean the entire surface. |
| 3 | Use a tack cloth to wipe the entire floor, applying slight pressure to pick up any remaining dust. |
Applying Wood Stain or Sanding Sealer
If you want to change or enhance the color of your wood floors, applying a wood stain can be the perfect solution. Choosing the right wood stain is crucial to achieve the desired color and complement the type of hardwood flooring you have. Consider the color tone you want to achieve and make sure the stain is compatible with your wood species.
Remember to always test the stain on a small inconspicuous area of the floor to ensure you are happy with the final result.
When applying the stain, it’s important to follow the direction of the wood grain. This helps to achieve an even and natural-looking finish. A foam applicator pad is a great tool for applying the stain, as it allows for smooth and controlled application.
It’s best to work in manageable areas, applying the stain evenly and avoiding any pooling or dripping. This ensures a consistent color throughout the floor.
After applying the stain, it’s crucial to remove any excess stain that hasn’t penetrated the wood. Use a clean cloth or rag to gently wipe away the excess stain. This step is important to prevent the stain from becoming sticky or tacky and to allow it to dry properly.
Allow the stain to dry completely before proceeding to apply the finish. This ensures that the stain is fully set and ready for the next step.

| Benefits of Applying Wood Stain | Considerations |
|---|---|
|
|
Applying Wood Finish
Once you have completed sanding and preparing your wood floor, it’s time to apply the final protective coat of wood finish. Choosing the right wood finish is essential for achieving a durable and long-lasting result. There are two main types of finishes to consider – water-based polyurethane and oil-based finishes. Each has its advantages and drying times, so make sure to select the one that best suits your needs.
To apply the wood finish, using a lamb’s wool applicator is recommended. This type of applicator helps ensure a smooth and even application. You can find lamb’s wool applicators at most home improvement stores. Start by pouring the wood finish into a clean container and dip the applicator into the finish. Make sure to remove any excess before applying it to the floor.
When applying the finish, work in smooth and even lines, following the direction of the wood grain. This will help achieve a professional-looking finish. If you have a large area to cover, consider working in manageable sections to prevent the finish from drying too quickly.

For better protection, it is recommended to apply multiple coats of wood finish. Between coats, lightly sand the floor using fine-grit sandpaper. This will help create a smooth surface for the next coat. After sanding, make sure to vacuum up any dust or debris before applying the subsequent coat.
Remember to follow the manufacturer’s instructions regarding drying times between coats. This will ensure that each coat has enough time to dry properly before applying the next one.
By applying the wood finish with care and attention to detail, you can achieve a beautiful and long-lasting finish for your wood floor.
Wood Floor Refinishing Tips
When it comes to refinishing wood floors, there are a few important tips to keep in mind to ensure a successful and professional-looking result. Whether you’re a DIY enthusiast or hiring a professional floor restoration service, these tips will help you achieve the best possible outcome for your refinishing project.
1. Changing Grades on the Drum Sander and Edger
One key tip for achieving a uniform consistency across your entire floor is to change grades on the drum sander while using the edger with the same grade sandpaper. This ensures that the sanding process is consistent throughout the floor, resulting in a smooth and even finish.
2. Prioritize Safety
While refinishing wood floors, it’s essential to prioritize safety. Make sure to wear a dust mask, safety goggles, and ear protection while using the sander to protect yourself from dust particles and loud noise. Safety should always be your top priority during any floor renovation project.
3. Fill Holes and Test Stain or Finish
Before applying the stain or finish, it’s crucial to fill in any holes or imperfections in the floor with wood putty or filler. This helps create a smooth and flawless surface for the stain or finish to adhere to. Additionally, spot testing the stain or finish on a small, inconspicuous area of the floor is essential to ensure the desired color and finish outcome.
4. Apply Stain or Finish from the Exit Door
For a professional-looking finish, it’s recommended to start applying the stain or finish from the exit door of the room. This way, you won’t have to walk on freshly finished areas while progressing through the room, avoiding footprints or smudges that can ruin the overall appearance of the floor.
| Tips for Wood Floor Refinishing |
|---|
| Change grades on the drum sander while using the edger with the same grade sandpaper |
| Prioritize safety by wearing a dust mask, safety goggles, and ear protection |
| Fill holes in the floor with wood putty or filler |
| Spot test the stain or finish before applying it to the entire floor |
| Apply stain or finish from the exit door to avoid footprints |
By following these wood floor refinishing tips, you’ll be on your way to achieving a beautiful, restored floor that adds charm and elegance to your home or space. Remember to take your time, follow the proper techniques, and enjoy the process of transforming your wood floors into stunning focal points.

Conclusion
Refinishing wood floors can be a challenging but rewarding project. By following the proper steps and taking necessary precautions, it is possible to restore the natural beauty of wood floors. Whether you decide to tackle the job yourself or hire a professional, proper preparation, sanding, staining, and finishing techniques will be key in achieving stunning results.
Before embarking on a wood floor refinishing project, it’s important to consider the size of the job, the condition of the floor, the type of wood, and any special considerations. This will help ensure that you choose the right tools and materials, as well as anticipate any potential challenges that may arise.
Remember, patience and attention to detail are crucial when refinishing wood floors. Take your time to properly prepare the floor, sand it evenly, apply the stain or finish carefully, and follow recommended drying times. This will help you achieve a smooth and durable finish that enhances the natural appeal of your wood floors.
FAQ
What is the first step in refinishing wood floors?
How do I remove base moulding for floor refinishing?
What are the steps for rough-sanding the floor?
How do I sand edges and corners of the floor?
What is screening the floor?
How do I remove all dust from the floor?
How do I apply wood stain or sanding sealer?
What is the process for applying wood finish?
What are some wood floor refinishing tips?
Any concluding thoughts on wood floor refinishing?
Source Links
- https://www.homedepot.com/c/ah/how-to-refinish-hardwood-floors/9ba683603be9fa5395fab901a1d66e5
- https://www.forbes.com/home-improvement/flooring/how-to-refinish-hardwood-floors/
- https://www.peteshardwoodfloors.com/wood-floor-techniques/sanding-floors/9-tips-you-must-read-before-sanding-your-hardwood-floor/